Quality & Precision
Why do we grind?
Grinding is used to remove stock, large or small amounts, to achieve a desired thickness that can’t normally be bought as a stock item and would require a “mill run” which consist of large pound quantities and long lead-times.
We provide much tighter tolerances than most mills, such +/-.001” and +/-.0005” on specific jobs. Typically most mills will hold a standard +/-.004”.
Importance of Surface Finish
Heighten the Quality of Material
How do you measure surface finish?
Ra

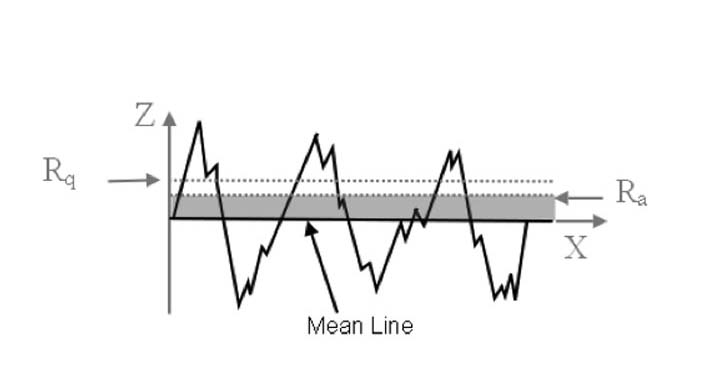
Ra is the mean (average) of the peaks and valleys within the sampling length.
RMS & Rq

The Root Mean Square (RMS) roughness (Rq) is the root mean square average of the roughness profile ordinates.
Rz

Rz is the sum of the highest peak from the mean line and that of the deepest valley from the mean line within the sampling length.
The PMG 100% Inspection
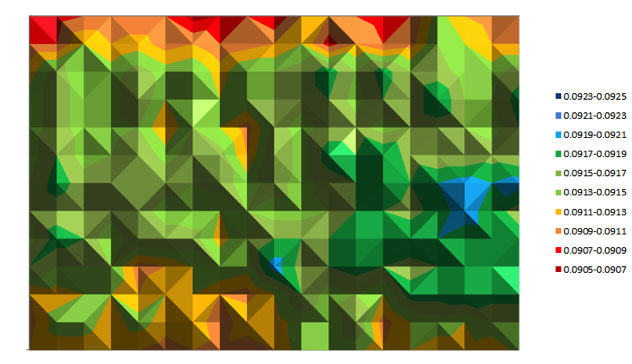
A 100% inspection is exactly what it sounds like. It is a check on every single piece of work to ensure your requirements are met. Using some the of latest equipment available such as Ultrasonic Thickness Devices and Profilometers, we map out each and every one of your sheets/plates.
Based on the criticalness of your application we can do a simple 15-point thickness map or a complex mapping of thickness reading to every 4 square-inches out to the fourth decimal (x.xxxx).
Our standard practices include delegated inspection reports, to ensure your incoming product and material is within requirements, saving you money and time.
[ Below: Topological data visualizations of surface variances after measurement. ]


We are an
International Titanium Association Member

In our continued effort to better understand our customer’s needs in this changing market, we have been a proud International Titanium Association (ITA) Member. In addition, to helping us stay up to date in this industry, ITA has given us an opportunity to meet our customers face-to-face in the several exhibition shows held each year. Check our profile at www.titanium.org for upcoming events.

